The summer sun makes your home’s roof feel like an oven, increasing energy bills. But, what if you could have a roof that’s tough and keeps your home cool? Modified bitumen roofing is a great choice for DIY enthusiasts1.
This guide will walk you through installing a modified bitumen roof on your own, from the beginning to the end. With over 6,000 licensed contractors ready to help, you can find the right expert1. For DIY lovers, the peel-and-stick method is ideal, avoiding the risks of fire and fumes1.
Are you planning to update your roof or start anew? This project is within your reach. With the right tools and some hard work, you can change your home’s look and enjoy a modified bitumen roof for many years.
Remember, torch-down installation for modified bitumen roofing is best left to experts due to fire risks1. But, the peel-and-stick method is perfect for DIY fans, avoiding fire and fumes1.
Let’s begin your journey with modified bitumen roofing. Discover durable and long-lasting roofing solutions that boost your home’s look and energy efficiency.
Introduction to Modified Bitumen Roofing
What is Modified Bitumen Roofing?
Modified bitumen roofing is a modern type of flat roof. It started in the 1960s as a better option than traditional asphalt roofs2. It’s made of two or more layers, making it very long-lasting2.
In the U.S., modified bitumen roofing has become very popular, replacing older roofing types3. It’s known for being strong, flexible, and keeping out weather, making it great for flat roofs3.
There are different ways to put on modified bitumen roofing, like heat welding or using adhesive3. On average, these roofs last about 20 years with good care23.
There are two main types: APP and SBS. APP uses plasticized asphalt for flexibility and UV protection. SBS mixes asphalt with rubber for flexibility and works well in extreme weather3.
Modified bitumen roofs can handle tough weather, like strong winds and heavy snow4. They’re also good for places that get a lot of foot traffic, making them great for businesses and industries4.
Putting on modified bitumen roofing is easier than old roofing methods4. Self-adhered membranes make it simpler and safer to install3.
It’s also good for the planet because it can be recycled4. Plus, it protects against UV rays, keeping the roof looking good and lasting longer4.
Overall, modified bitumen roofing is a top choice for flat roofs. It offers many benefits, like being strong, weatherproof, energy-efficient, and easy to install234.
“Modified bitumen roofing has become a popular choice for flat roof applications, offering a unique blend of durability, flexibility, and energy efficiency.”
Preparing for a DIY Modified Bitumen Roof Installation
DIY fans looking to install modified bitumen roofing need the right DIY modified bitumen roofing materials and roofing tool requirements. This roofing system has a base and a cap sheet, both self-adhering5.
Required Materials and Tools
For a DIY modified bitumen roofing job, you’ll need specific materials and tools. You’ll need the base and cap sheets, plus a utility knife, trowel, and roller for application5. Having all your roofing tool requirements ready before you start makes the installation smooth and efficient.
Roof Deck Preparation
First, make sure the roof deck preparation is done right. The deck must be clean, dry, and free of debris or old roofing5. If the deck is worn out, replace it with plywood or OSB. Check for rotten or missing planks and ensure the deck is well-supported6.
A well-prepared roof deck is key for the roofing system’s long life. Spending time on a clean, stable, and supported deck will help your roof last longer56.
“The discussion delves into the differences between Atactic Polypropylene (APP) and Styrene Butadiene Styrene (SBS) in Modified Bitumen.”5
With careful planning and preparation, homeowners can succeed with their DIY modified bitumen roofing. This approach leads to a durable and lasting roofing solution567.
DIY Modified Bitumen Roofing Installation
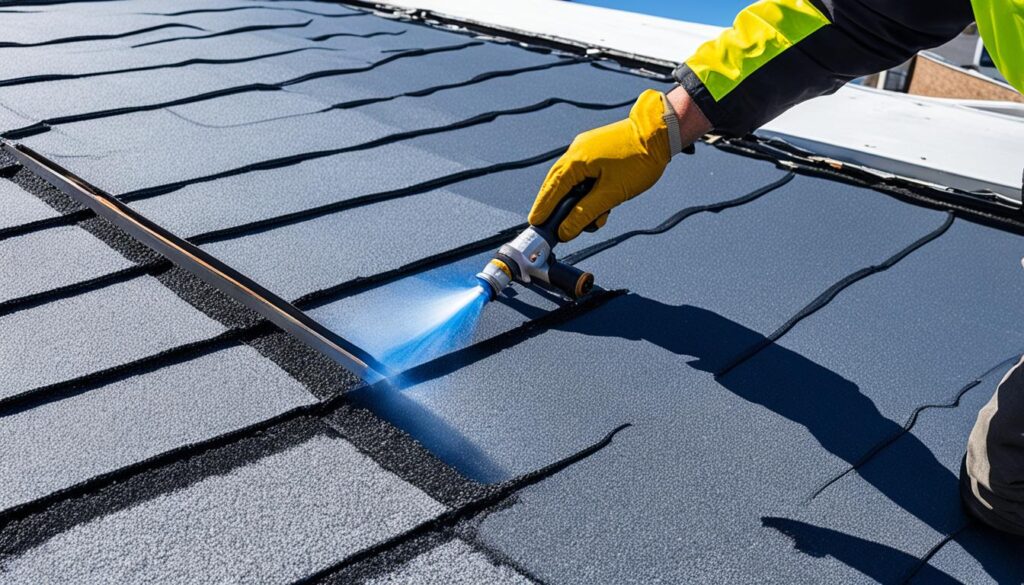
Peel-and-Stick Installation Method
The peel-and-stick method is a favorite for DIY roof projects1. It’s great for DIY because it’s safe and doesn’t have the dangers of torch-down methods1.
First, prepare the roof deck by removing old roofing to avoid bumps and water pooling8. Adding a recover board is also a good idea to prevent problems8.
Next, put down the base sheet, overlapping each piece for a strong bond8. Remove the release paper as you go to let the adhesive stick8. Finish with metal drip edge for extra protection in windy areas8.
For the final step, install the cap sheet, removing the release paper as you go1. Make sure to let the material relax and cut it to size for easy fitting8. Also, prime the drip edge before adding the cap sheet for better adhesion8.
By using the peel-and-stick method, DIY fans can put in a modified bitumen roof that lasts8. Remember, you might need permits for your project, depending on your area’s rules8.
“Peel-and-stick modified bitumen roofing is a great option for DIY roof installation, as it’s easy to work with and doesn’t require any open flames or special equipment.”
With careful prep and attention, homeowners can get a pro-quality modified bitumen roof with the peel-and-stick method81.
DIY modified bitumen roofing installation
Installing DIY modified bitumen roofing is a detailed process. It needs careful attention and following the manufacturer’s guide. This roofing is tough and stands up to the weather, making it great for flat or low-sloped roofs1.
Modified bitumen roofing works well with old tar roofs, going right over them1. This can cut down on time and cost. But, make sure the old roof is in good shape and ready for the new layer8.
There are two main ways to install DIY modified bitumen roofing: torch-down and peel-and-stick. Torch-down uses a propane torch, which can be risky and needs caution1. Peel-and-stick doesn’t need a torch, making it safer for DIY1.
Before starting, prepare the roof deck well. It should be clean, dry, and clear of any debris or blocks8. Have all the materials ready, like roofing felt, drip edge flashing, and roofing cement, for a successful job1.
With the peel-and-stick method, overlap the roofing sheets by at least six inches for a strong seal1. This takes time but is key for a roof that lasts8.
New roofing materials for DIYers are coming out, like self-adhering modified bitumen roll roofing for flat roofs8. These products are easy to find at home centers and building supply stores, perfect for DIY projects8.
The DIY modified bitumen roofing process needs good planning and following the manufacturer’s guide. With the right tools and materials, homeowners can get a strong, lasting roof that keeps their property safe from the weather189.
Finishing Touches and Maintenance
Once your modified bitumen roofing is in place, it’s time for the final touches and upkeep. Taking good care of it is key to its long life and performance. Let’s look at how to seal the edges and keep your roof in top shape.
Start by sealing the edges with top-notch roofing cement. This ensures a strong seal that keeps out leaks and moisture.10 After that, roll the roof’s surface to make sure everything sticks together well11.
Keeping up with DIY roof maintenance is vital for your roof’s life. Check it often for damage like cracks or leaks and fix them fast10. Also, keep the roof clean of leaves and twigs to stop problems before they start12.
“Proper roof maintenance is like preventive healthcare for your home – it’s essential to catch and address any issues early on before they become larger, more costly problems.”
By following these easy steps for modified bitumen roofing finishing and DIY roof maintenance tips, your roof will keep protecting your place for many years111012.
Conclusion
DIY modified bitumen roofing is a smart and budget-friendly option for homeowners wanting a strong roof13. It’s cheaper than hiring a pro, especially in fall and winter when pros are less busy13. This roofing material stands up well to weather, doesn’t tear easily, and stays stable in temperature changes14.
To make a DIY modified bitumen roofing project work, prepare the roof deck well, put on the base and cap sheets right, and keep up with maintenance15. With the right tools and materials, and careful attention, homeowners can get a roof that lasts long and saves energy14. Doing it yourself lets homeowners feel proud of their work and have a roof that looks great and keeps out the weather for years14.
DIY modified bitumen roofing has many benefits like saving money, lasting a long time, and saving energy131415. It’s a great choice for homeowners looking for a practical and fulfilling home project131415.

Meet William Adams, a seasoned roofing expert with over 30 years of hands-on experience in the industry. Having worked tirelessly under the scorching sun and through the fiercest storms, William brings a wealth of knowledge and expertise to the table. Hailing from the heart of the USA, he’s witnessed the evolution of roofing practices firsthand, mastering every aspect along the way. Now retired from the field, William spends his days cherishing time with his loved ones while sharing his invaluable insights through this platform. With William at the helm, you can trust that every tip, advice, and recommendation provided is backed by years of real-world experience and unwavering dedication to quality craftsmanship. Join us as we journey through the world of roofing, guided by the wisdom and passion of a true industry veteran.

